- Infos im HLRS Wiki sind nicht rechtsverbindlich und ohne Gewähr -
- Information contained in the HLRS Wiki is not legally binding and HLRS is not responsible for any damages that might result from its use -
Hawk PrePostProcessing: Difference between revisions
| Line 51: | Line 51: | ||
===== Connection of ParaView Client and Server via pvconnect ===== | ===== Connection of ParaView Client and Server via pvconnect ===== | ||
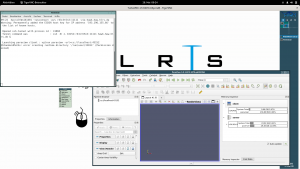
[[File:ParaView client connected to pvserver.png|thumb|ParaView Client connected to pvserver]] | [[File:ParaView client connected to pvserver.png|thumb|ParaView Client connected to pvserver]] | ||
To connect a graphical ParaView client executed within the vnc session on Vulcan with the server running on the Hawk compute nodes a ssh tunnel has to be established. For convenience we provide in the client installation the <code>pvconnect</code> script. The script takes two arguments. | To connect a graphical ParaView client executed within the vnc session on Vulcan with the server running on the Hawk compute nodes a ssh tunnel has to be established. For convenience we provide in the client installation the <code>pvconnect</code> script. The script takes two arguments. | ||
#<code>-pvs</code> is the combination <code><servername>:<portnumber></code> isseued during pvserver startup under <code>Accepting connection(s):</code>. | |||
#<code>-via</code> is the hostname of the machine over which to tunnel onto the pv server host. | |||
Usually this is hawk.hww.hlrs.de. So taking the example from the server startup given above, to launch a ParaView client within a VNC desktop session and directly connect it to a running server on Hawk compute nodes use: | Usually this is hawk.hww.hlrs.de. So taking the example from the server startup given above, to launch a ParaView client within a VNC desktop session and directly connect it to a running server on Hawk compute nodes use: | ||
<pre> | <pre> | ||
Revision as of 09:59, 28 May 2021
For pre- and post-processing purposes with large memory requirements multi user smp nodes are available. These nodes are reachable via the smp queue. Please see the node types, examples and smp sections of the batch system documentation.
Remote Visualization
Since Hawk is not equipped with Graphic Hardware, remote visualization has either to be executed via the Vulcan cluster or via locally installed clients.
Paraview
ParaView is installed on Hawk with mpi support for parallel execution and rendering on the compute nodes. The installation is available via the module environment.
module load paraview/server[/<version>]
To enable parallel data processing and rendering on the CPU Paraview is installed with the mesa llvm gallium pipe. This means the Qt based graphical user interface (GUI) i.e. the paraview command and with that the ParaView client is not available. Scripted usage is possible via pvbatch. For interactive parallel post-processing and visualization pvserver has to be used.
Client-Server Execution using the Vulcan Cluster
Graphical ParaView clients matching the server versions on Hawk are installed on the Vulcan cluster. For efficient connection we recommend to use the vis_via_vnc.sh script available via the VirtualGL module on Vulcan.
Setting up the VNC desktop session
ssh vulcan.hww.hlrs.de
module load tools/VirtualGL
vis_via_vnc.sh
Please note that this will reserve a standard visualization node in Vulcan for one hour. Additional nodes with other graphic hardware are available and the reservation time can of course be increased. for a full list of options please use
vis_via_vnc.sh --help
To connect to the vnc session on the visualization node from your local client computer use one of the methodologies issued by the vis_via_vnc.sh script. The recommended way is to use a TigerVNC viewer or TurboVNC viewer with the -via option.
vncviewer -via <user_name>@cl5fr2.hww.hlrs.de <node_name>:<display_number>
After successfull connection you should be logged in to a remote Xvnc desktop session.
Setting up pvserver
In parallel a regular compute node job has to be requested on Hawk. E.g.
qsub -l select:nodes=2:mpiprocs=128,walltime=01:00:00 -I
Once logged in to the interactive compute node job load the paraview/server module and launch pvserver.
module load paraview/server[/<version>]
mpirun -n 256 pvserver
If pvserver was launched successfully it should issue the connection details for the paraview client. E.g.:
s32979 r41c2t6n4 203$ mpirun -n 256 pvserver
Waiting for client...
Connection URL: cs://r41c2t6n4:11111
Accepting connection(s): r41c2t6n4:11111
Connection of ParaView Client and Server via pvconnect
To connect a graphical ParaView client executed within the vnc session on Vulcan with the server running on the Hawk compute nodes a ssh tunnel has to be established. For convenience we provide in the client installation the pvconnect script. The script takes two arguments.
-pvsis the combination<servername>:<portnumber>isseued during pvserver startup underAccepting connection(s):.-viais the hostname of the machine over which to tunnel onto the pv server host.
Usually this is hawk.hww.hlrs.de. So taking the example from the server startup given above, to launch a ParaView client within a VNC desktop session and directly connect it to a running server on Hawk compute nodes use:
module load tools/paraview
pvconnect -pvs r41c2t6n4:11111 -via hawk.hww.hlrs.de
The connection and memory load on the server can be checked within the client by activating the Memory Inspector via the View menu within the ParaView client.

